
Table of Contents
What is Appium?
-Appium is an open source tool which works in client server architecture. Appium server is http server written in node.js and used for working with different softwares. It is popularly used for mobile apps by developers and automation testers to render app UI screens and identifying element properties. Appium is cross platform tool, meaning that it supports different platforms.
How does it work:
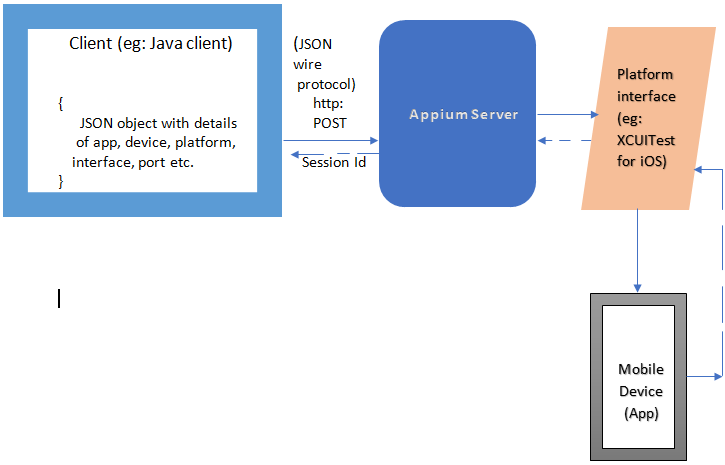
-Appium uses the client libraries provided by different programming languages like Java, C#, Python etc. and also the interfaces provided by different platforms like Android and iOS for mobile. The client server communication happens through mobile JSON Wire protocol. It uses Selenium WebDriver API as interface to ‘POST’ the http request to the Appium Server. The client sends the http request with the app, device and platform, and interface details, in json object format, through the webdriver API to the Appium server.
The server then identifies the device and app and returns the response and session Id. Then we can say that a “session” is established between client and the Appium server for the app.
Platform Interfaces:
- Android provides the interface UIAutomator2 which appium leverages for interacting with Android device apps.
- iOS similarly provides the XCUITest interface.
Appium Desktop Client:
-
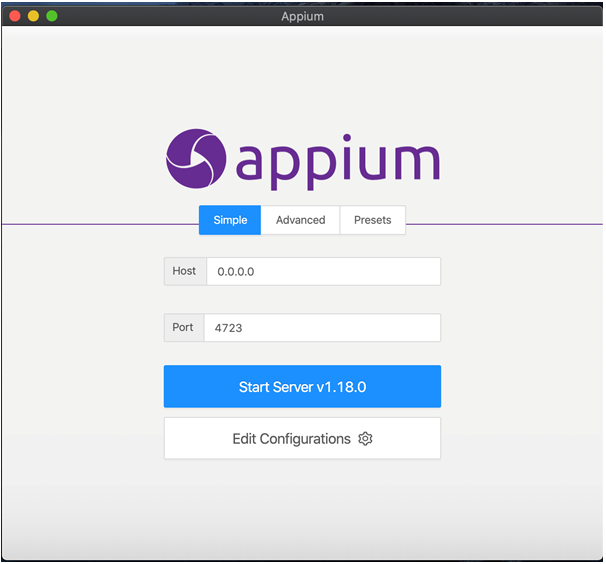
- Appium Desktop client is a UI desktop tool, which is used to open the mobile app in the connected mobile device and identify different mobile element properties in different app screens.
-
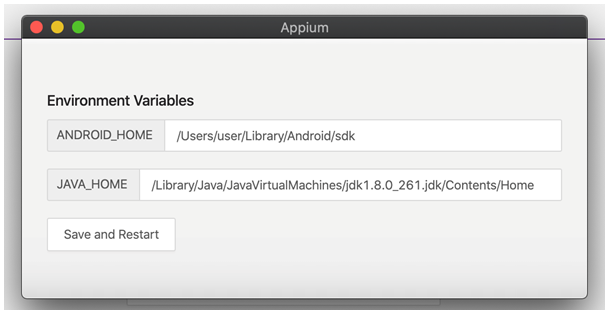
- User needs to specify the Android_Home and Java_Home paths, in the Edit Configurations, for working with Android platform.
-
- The default port for appium is 4723. If you want to specify any different port, you can specify that in the Port field.
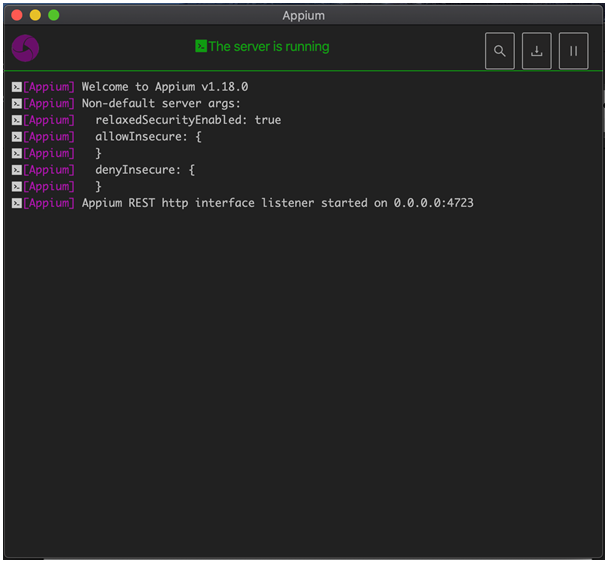
- Start the appium server by clicking on ‘Start Server’ button. It will show the below screen when server is started:
-
- Click on the search icon which is ‘Start Inspector Session’ button. The following screen opens:
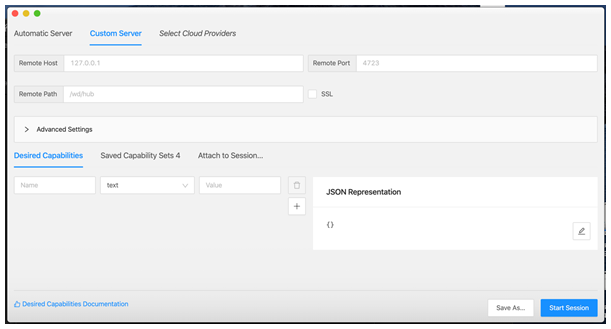
- Desired Capabilities is the key value pair of the parameters needed to be sent on the server request as json object.
- Using the + icon on the right user can add the desired capabilities.
For iOS following desired capabilities are needed:
After specifying the desired capabilities details, click on “Save As” button and name the desired capabilities.
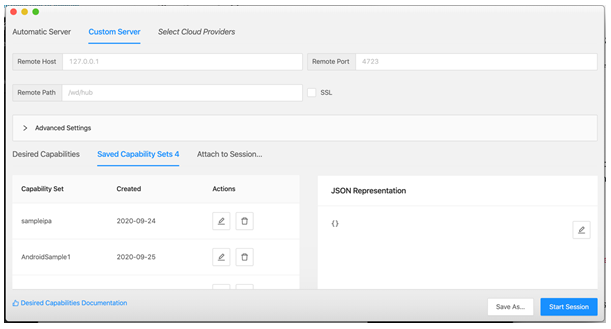
-
- Select the Saved capabilities and click ‘Start Session’. The mobile UI will start rendering on the appium window.
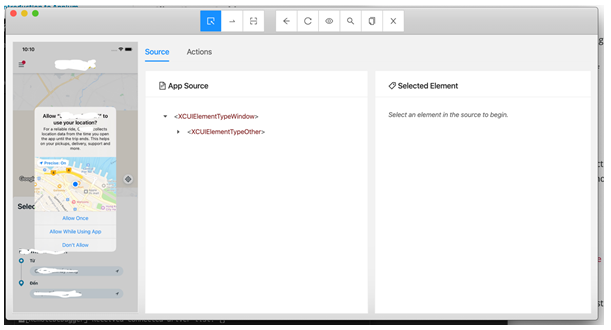
In the Source tab, user can see the element locator hierarchy.
-
- User can click on any of the app source locator properties and click on “Search For Element” .
- User can select the Locator Strategy from the dropdown
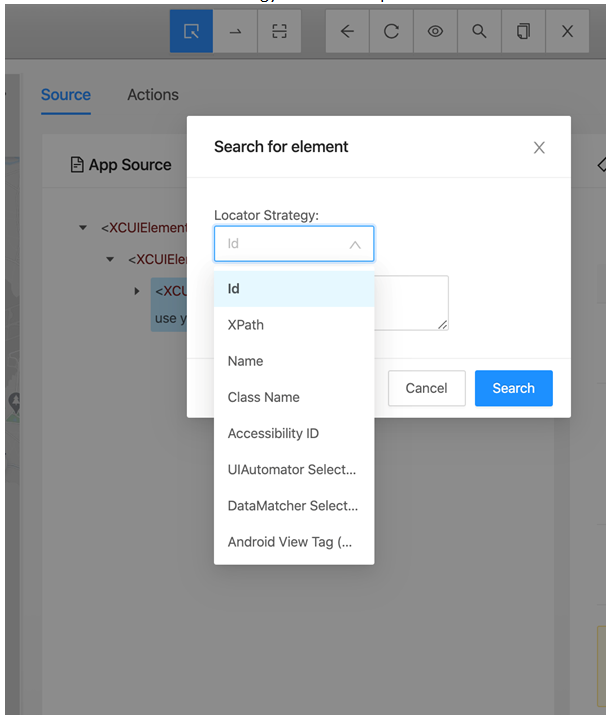
- Enter the property in the Selector edit box and click on ‘Search’ button. The element should get highlighted, thus confirming that the locator property is correct.
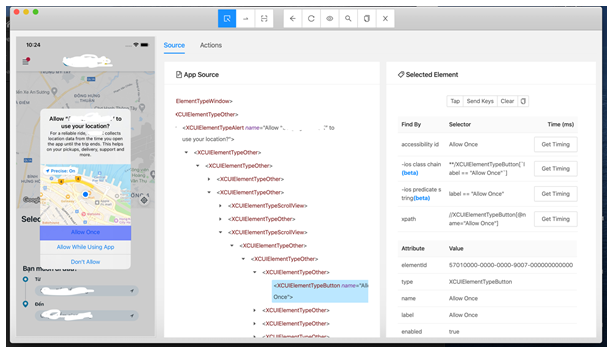
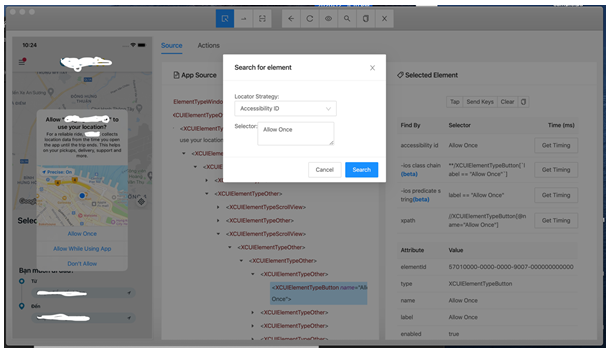
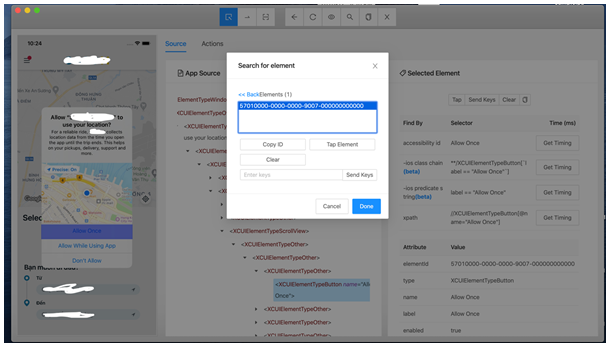
Now user can consider this locator property for identifying the element.
Mobile Locator Strategies:
In general, these are the locator strategies which are available for Automated Testing:
- Id
- XPath
- Name
- Class Name
- Accessibility ID
- UIAutomator Selector (Android UiAutomator2)
- DataMatcher Selector (Android Espresso)
- Android View Tag (Android Espresso)
- Predicate String (iOS)
- Class Chain (iOS)
The locators which are recommended are
- Id (TestID)
- Name
- Accessibility ID
- Predicate String (iOS)
- Class Chain (iOS)
XPath locators are prone to change when your app layout changes. Hence, it should be given least priority.
By using any these locator specifications (locator name and properties), user can uniquely define each of their mobile elements and then work on it.


